When she asked if I would be interested in helping her with a project near and dear to her heart, I couldn't say no!

Not only that, but she organized the drive with Hopeful Threads!
They are trying to collect 100 e-reader sleeves/covers and pillow cases for servicepeople abroad.
I asked if I could make an ipad cover. I wanted to make it beginner friendly. You can, of course, adjust the measurements for any e-reader.
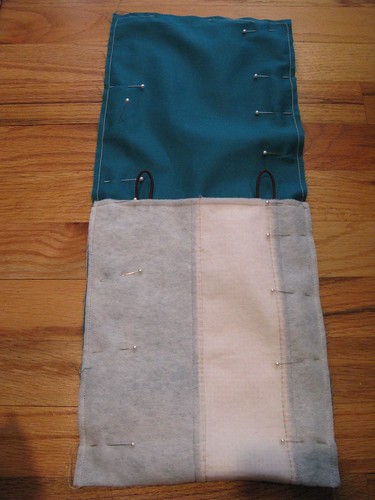
I cut three pieces. Two pieces for the lining, 9"x11" each. One piece for the body of the cover, 21"x9". You can piece it together however you want and then cut it to size if you wish. (I'm thinking I have some orphan blocks that will be reformed into colorblock/improv strips for a few more.) I'm going to try to make some in linen, but I have to restock my supplies. The only other ingredients you need is a piece of fusible fleece (21"x9"), 2 hair elastics, and 2 buttons.
(oops...I had already fused the fleece on in this photo)
Recap of "ingredients":
(2) 9"x11" lining pieces
(1) 9"x21" exterior piece
(1) 9"x21" fusible fleece
(2) hair elastics
(2) buttons
Assembly is easy.
1. Iron the fusible fleece to the exterior piece.
2. Sew one piece of lining to one end of the exterior piece. (All your pieces will now make a LONG piece that goes, interior, exterior, interior.
3. On the other end, pin the two hair elastics each two inches in from the top edge. Layer the other lining piece on top of it. (Think of it as a hair elastic sandwich, with the lining and exterior as the bread pieces.) Sew.
4. Fold the long piece (with right sides facing). Sew along the edge in a giant U (leaving a 3" gap at the end of the lining edge of the sandwich.
6. Press.
7. Topstitch the top edge.
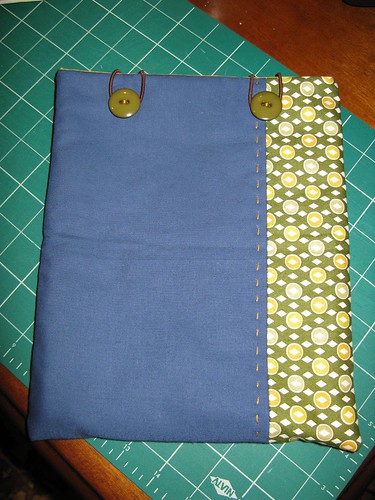
8. Sew on the buttons.
10. If you so desire, repeat!
I hope y'all will make one. Honestly, I made it easy. At least as easy as I could.
You can add all kinds of fun embellishments. Improv! Hand stitch! Really, it's an awesome cause. Rumor has it that they'll be drawing some prizes over at Hopeful Threads for the folks who help contribute to this! There's also a flickr group to join and lots of other awesome bloggers doing tutorials.
Thank you, Melissa, for letting me help say thank you to our troops!


This is awesome! Thank you so very much!!!
ReplyDeleteThis looks great! Thank you so much!
ReplyDeleteGreat tutorial and for an important cause! Will have to pin it. Best to you, Sondra
ReplyDeletePhew, glad it passed its cinderella moment in the end :o)
ReplyDeleteVery cute, thanks!
ReplyDeleteGreat tutorial, such a quick and easy process =D
ReplyDeleteLooks great! Thanks for the tutorial.
ReplyDeleteLove this! Looks like something I can do!
ReplyDeleteThank you for a great tutorial! Appreciate you helping Melissa and Kristy with their September project. As a Marine Corps mom whose son is currently deployed in Afghanistan, I'm so happy so many people are helping and supporting our military men and women. Can't wait to give your tutorial a try!
ReplyDeleteGreat tutorial. I love the simplicity of it.
ReplyDeleteIt's a really cute pouch! Thanks for sharing, Ella!
ReplyDelete